

Which Pop Century Is Closest to Art of Animation
Brand your own pop fine art portrait

Hither we'll convert a bland portrait into a pop art masterpiece. It'due south a brilliant way to become creative and enliven your forgettable shots. For this tutorial, we'll be using Photoshop filters, selection tools, Adjustment Layers and Layer Masks, and the Hue/Saturation command.
- Popular Fine art: 8 artists every designer should know
You may have noticed that our start image isn't that sharp! This is an added bonus of pop art images: you can utilize images that would otherwise have been discarded.
01. Make it mono
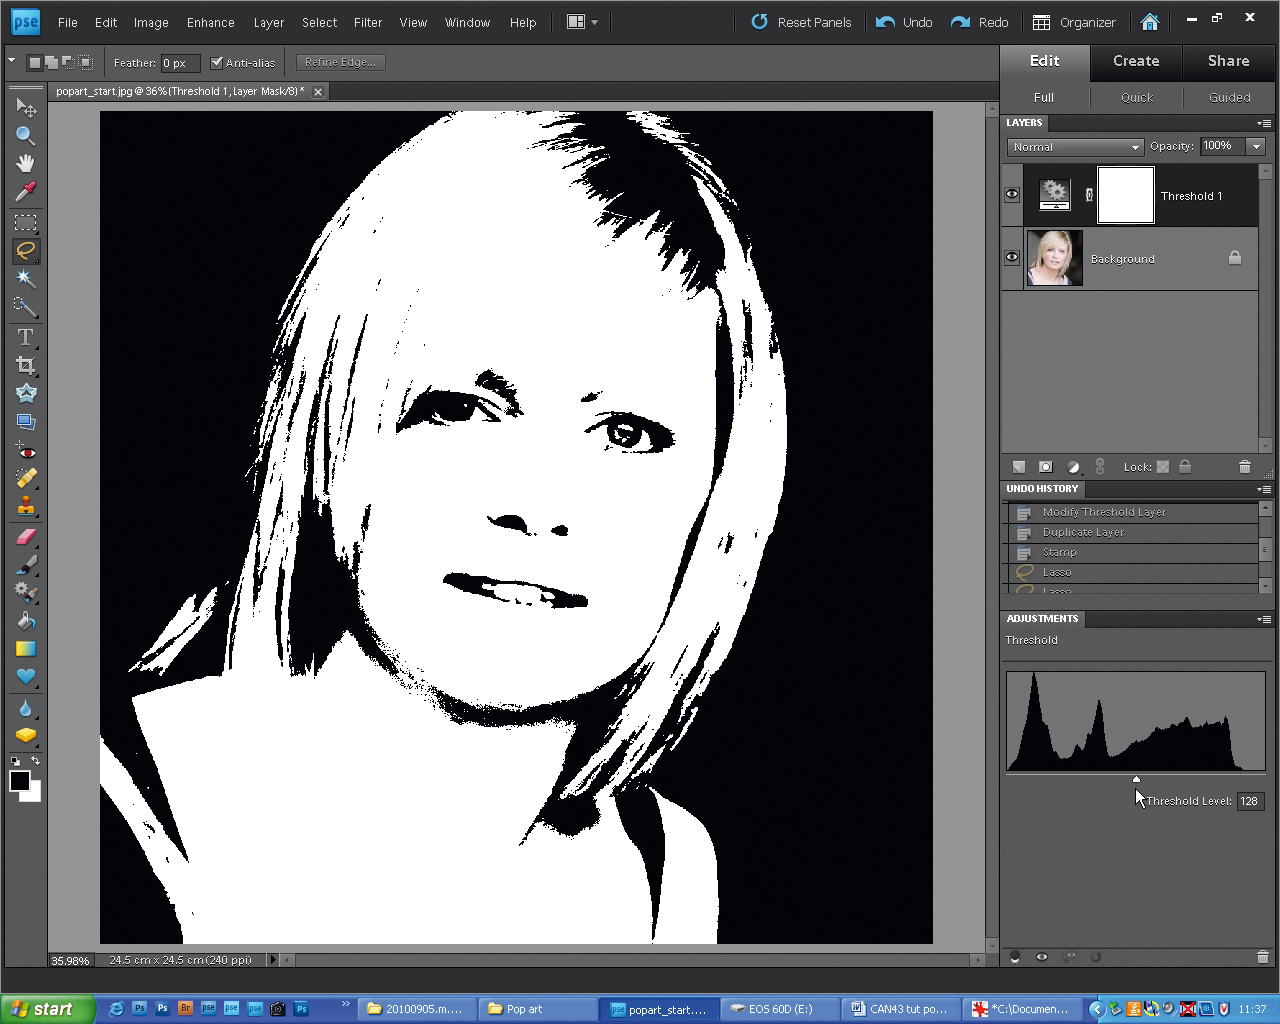
Commencement open up upward your portrait in Photoshop. Go to 'Layer > New Adjustment Layer > Threshold', and ready Threshold to about 128. To bring out more than detail in the eyes and mouth, select the 'Background' layer, go to 'Layer > Indistinguishable Layer'. From 'Filter > Sketch > Stamp', set Light/Dark Residuum to 26 and Smoothness to ane. Now use the Lasso tool to describe around the eyes and rima oris, holding downwardly Shift to add to your pick each fourth dimension.
02. Burnish your background

Click Add Layer Mask to create a mask out of your pick. Now to modify the groundwork colour from black to green. Highlight the elevation 'Threshold 1' layer and use the Quick Selection tool to select the groundwork either side of the figure. Hold Alt to subtract from your choice in guild to tidy it upward. Click the half-moon icon on the Layers palette, and select a Solid Color Aligning Layer.
03. Clean upwardly edge item

Choose a light-green from the Colour palette. To tidy the edges, use the Brush tool (press B) to paint over your Layer Mask to reveal detail below. Press D to modify the default foreground/background colour to white/black, press Ten to gear up foreground colour to blackness, then pigment round the edges of the hair if needed. Click X to toggle between a white/black brush if you need to paint the light-green groundwork back in.
04. Make the hair stand out

To turn the pilus bright yellow, showtime take hold of the Magnetic Lasso tool. Beginning at the bottom-left of the pilus and depict carefully effectually the outside border. Use your creative sentence when it comes to the within strands and fringe! Go on drawing until y'all reach your start point again, and click when two small circles appear to complete the pick. Again create a Solid Colour Adjustment Layer, pick a yellow, and click OK.
05. Blend and brush

Use the driblet-downwardly menu in the Layers palette to ready the Blending Way to Multiply, revealing the pilus outlines underneath. Reduce Opacity from 100% with the slider to lessen the colour's impact. Don't worry if your selection isn't neat – pop fine art should look a little uneven! You tin can tidy information technology up with a white/black brush over the Layer Mask to add/remove the yellow.
06. Adjust peel tones

Use the Quick Pick tool to select the face, neck and chest. Ensure 'Sample All Layers' is ticked. Printing Alt to remove areas such as shoulder straps from your selection. Then repeat as before; create a Solid Colour Adjustment Layer, cull a pink, ready Blending Way to Multiply, adjust Opacity if necessary. Employ a xxx-pixel white/black brush to pigment over the Layer Mask and make clean upwards any unwanted white $.25.
07. Modify center colour

To turn the optics blue, zoom right in (ctrl and +) and use the Lasso tool to depict around the iris of each eye. Then repeat the steps above to turn them blue, dropping Opacity down for more realistic look, and over again utilise Brush tool on a Layer Mask to tidy upwards whatever spilt ink! Do the same for the shoulder straps; we chose a purply-blueish colour here.
08. Increase canvass size
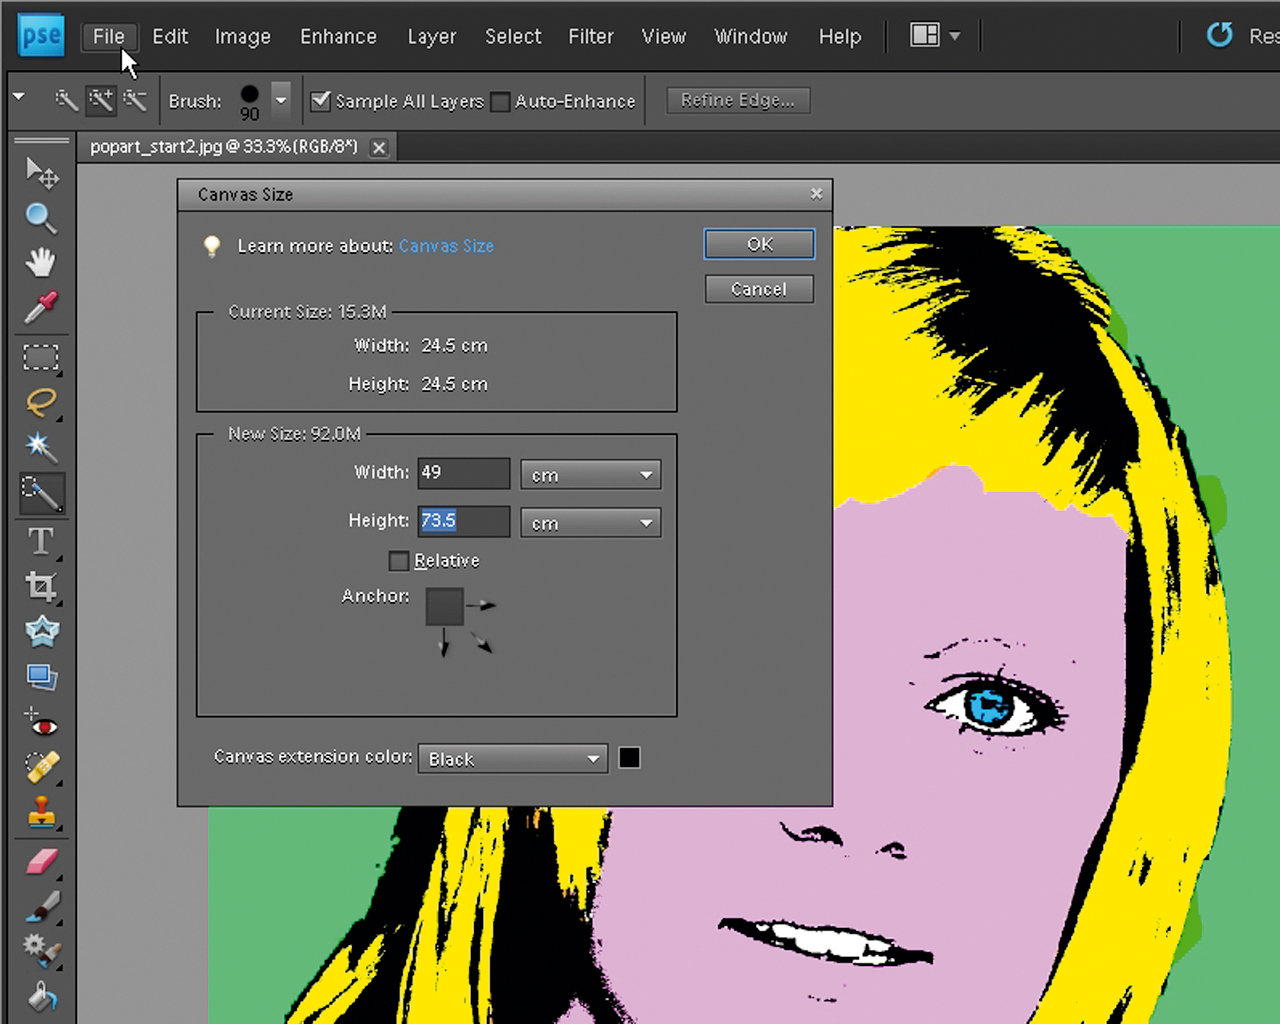
To create more than versions, offset go to 'Layer > Flatten Image', so 'File > Save As', and rename your file (we've used 'popart2.jpg'). Become to 'Image > Resize > Canvas Size'. To extend the sail, untick the Relative box, click the top-left arrow to ballast the image, and change to width 49cm and height 73.5cm for a portrait image. Finally, set the Canvas Extension Colour to blackness.
09. Mix information technology upwards

Relieve this new epitome with a new version proper noun ('popart3.jpg'). Reopen 'popart2.jpg', and press Ctrl+U to open Hue/Saturation. Only motility the Hue slider left or right to create a dissimilar coloured popular art image. Then use the Move tool to elevate-and-drop your new pop art picture on to the blank sail infinite on 'popart3.psd'.
10. Put it all together

Go dorsum to 'popart2.jpg', open Hue/Saturation and repeat the higher up procedure until you have four or six vibrant images on the 'popart3.psd' paradigm. Motion the images around on the sheet (highlighting the correct layer) so the images are in the all-time order and with no similar colours next to each other. Go to 'Layer > Flatten', and save it as a single-layered JPG.
Related articles:
- Colour in Photoshop: top tricks
- Get creative with Photoshop Alloy Modes
- Brilliant Photoshop tutorials
Related articles
Source: https://www.creativebloq.com/photoshop/make-your-own-pop-art-image-11121384
0 Response to "Which Pop Century Is Closest to Art of Animation"
Post a Comment